Actualités · 13 March 2026
The secret of the backspin: How to finally master it
Retro fascinates and frustrates at the same time. We see it in good shooters: the ball hits, stops suddenly, sometimes moves back, and the point is made cleanly. We try it ourselves: the ball goes too high, bounces haphazardly, or crashes like a brick without the slightest effect. The difference is not the power, nor the balls, nor the terrain. It's in a hand exit detail that no one really explains. Paquita breaks it down step by step. ↩ backward rotation — thisThe physics of the rétro — what really happens
Before working on the technique, you need to understand what happens physically. The backspin is not a "braked" shot — it is a shot in which the boule spins in the opposite direction to its travel at the moment of impact. It is this reverse spin that creates the brutal braking after the impact.
⚙️ PHYSICS OF THE BACKSPIN — 3 PHASES IN FLIGHT ↺ ↺ → travel The boule spins backwards (backspin) throughout the flight. The finger imparted this spin at the release. ON CONTACT 💥 ↺ ← reaction force At impact, the backspin opposes the momentum. The two forces cancel each other out or reverse depending on the angle. AFTER THE IMPACT ↺ ← possible recoil dead stop The boule stops dead or recoils slightly. The opposing boule has moved — not yours, or barely. 🔬The backspin works better on terrains that are hard or gravelly that allow the spin to "bite" the ground at the moment of contact. On very sandy or soft ground, the boule sinks in and the backspin loses its effectiveness — this is where the carreau (a shot that crushes directly without bouncing) becomes preferable.
Backspin vs carreau: these are not the same shots
Many shooters confuse backspin and carreau, or believe they are the same technique at different intensities. This is wrong. They are two distinct techniques with different objectives, angles of attack and preferred surfaces.
↩ TODAY'S ARTICLE The Backspin The boule arrives with a reverse spin, strikes the opposing boule and stops (or recoils) thanks to the braking effect. The opposing boule is ejected. Yours stays in place. Backward spin at the release 💥 COMPARISON The Carreau The boule arrives without significant spin and "crushes" the opposing boule directly from above. No spin effect — power replaces the effect. Different technique, different angle. No spin 🎯 COMPARISON The Iron Shot The boule touches the opposing boule directly in flight (without bouncing on the ground first). Can be combined with a backspin effect. Precision on the target is the central element. Direct contact in flight ↩ Backspin — when to use it- Hard or gravelly terrain
- When you want to stay in place after the shot
- Situation where your boule must "take the place" of the opposing one
- Medium distances (6 to 9 m) — the effect is more controllable
- When lateral precision is critical
- Soft, sandy ground that absorbs the spin
- When the opposing boule is in a hollow or a dip
- Short distance where momentum control is simpler
- When the ground is too uneven to predict the bounce
- When several boules are grouped together — crush the cluster
The motion broken down — the 6 steps of the hand release
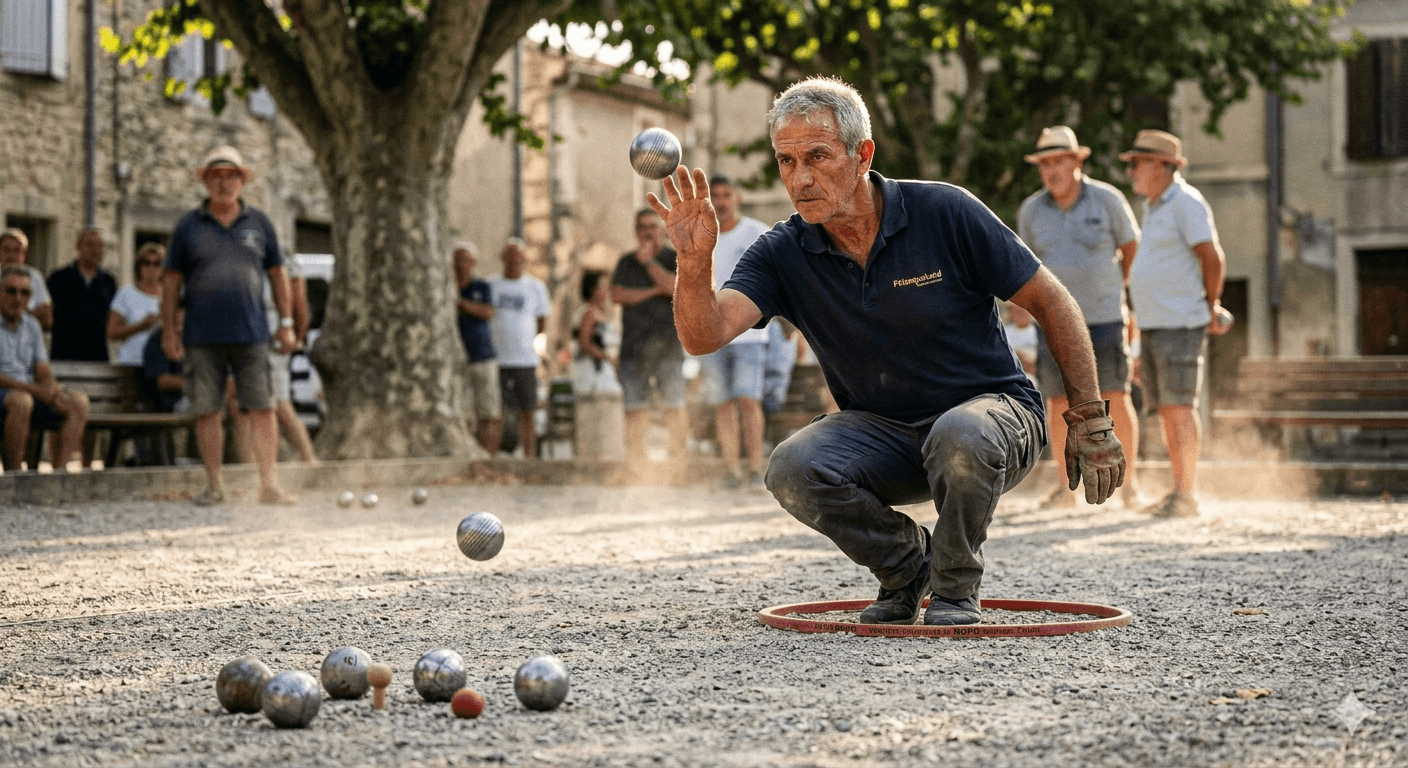
🎙️ Paquita on the secret of the backspin "The backspin is 90% in the last three centimetres of the hand release. Not in the swing, not in the speed, not in the power. In the precise moment when the fingers release the boule and in what order. Most people who miss their backspin open their hand too early or too uniformly — and the boule leaves with no effect at all. Master the hand release, the rest follows." — Paquita 1 The grip — fingers in a half-circle, palm facing up The boule rests in the hand, palm facing up at the start of the swing — this is the sign that you are going to produce a backspin. The hand will gradually turn over during the pendulum to arrive palm facing down at the moment of release. The fingers are slightly curved (not flat), forming a half-circle under the boule. The index and middle fingers carry most of the weight. → Palm facing up at the start = the basic condition for backspin ✗ Classic mistake: holding the boule palm facing down from the start — impossible to produce a proper backspin 2 The backswing — palm facing the sky During the back pendulum, the hand stays palm facing the sky, the fingers beneath the boule. Do not force the spin — let the weight of the boule naturally guide the position. The backswing is fluid, not tense. A hand that is too stiff in the back prevents the natural turn-over. → Relax the hand during the swing — do not lock it 3 The pendulum descent — the hand begins to turn over During the forward descent, the wrist naturally initiates a downward rotation. Do not force this movement — it must be the consequence of the swing, not a tense voluntary action. In the middle of the descent, the boule is still partially in the palm, the fingers are starting to pass over the top. → The wrist turn-over is gradual, not abrupt ✗ Classic mistake: turning the wrist over too early or too violently — the boule leaves without a controlled effect 4 The release point — fingers on top, the index finger pulls downward This is the most critical moment. At the release point, the hand is turned over palm facing down, the fingers on top of the boule. The boule is released by "sliding" the fingers downward and backward — as if you wanted to scratch the top of the boule toward you. The index finger is the last finger to leave the boule and it is the one that generates the backward spin effect. The thumb releases first. → The index finger "scratching" toward you at the release = the source of the backspin effect ✗ Classic mistake: opening the whole hand at once — no effect produced 5 The trajectory — a descending arc, not a straight line A boule thrown with a proper backspin does not follow a taut, flat trajectory — it describes a moderate descending arc. It is this angle of descent that allows the backspin to "bite" the ground at the moment of impact. A trajectory that is too taut (too low) loses the effect. A trajectory that is too high causes an uncontrolled bounce. → Visualise the boule descending in an arc, not in a flat arrow 6 The hand follow-through — do not block the movement After the release, the hand naturally continues its movement downward and backward — this is the natural follow-through. Do not block your arm mid-swing. An arm that stops abruptly after the release often signals a tension that preceded the release and altered the effect. A complete follow-through down to the bottom guarantees that the release was fluid. → The hand follow-through is the mirror of the quality of the release ✋ The pencil exerciseTake a pencil. Hold it as you would hold a boule (palm facing up, fingers curved). Do the pendulum movement in slow motion — from behind to the front — while observing how the wrist turns over naturally and how the fingers "scratch" the pencil at the moment of release. Repeat 20 times slowly without any boule. Your brain records this rotation pattern and then reproduces it with a real boule. This is the basic exercise for feeling the effect without the pressure of the result.
The 6 errors that kill the rétro
💪 Forcing the speed for "more spin" The boule leaves hard but with no visible backspin. The player believes more power = more spin. It's the opposite. ✓ Backspin live in the rotation, not the speed. A slow throw with a good release produces more spin than a hard throw with a bad release. 👐 Opening the whole hand at once The boule leaves with no spin — as if you were "placing" it in the air. All the fingers release at the same time. ✓ The release happens in sequence: the thumb first, then the other fingers, the index last. That's the one that "scratches" and creates the rotation. 📐 Trajectory too straight and too low The boule arrives almost flat, the backspin can't "bite" the ground on impact — it slumps down or keeps rolling. ✓ The boule must arrive with a sufficient downward angle (about 30 to 45°) so the reverse rotation creates effective braking on impact. 🔒 Wrist locked during the swing The wrist turnover is forced, jerky. The boule leaves with a spin or too far right/left. ✓ The wrist must stay relaxed throughout the swing. The turnover is gradual and natural — don't force it, let physics do the work. 👁️ Lifting the eyes at impact The boule deviates at the last moment. The player anticipates the result and alters their axis at the critical moment. ✓ The eyes stay locked on the aiming point (the opponent's boule or the target impact point) until the end of the hand follow-through. Don't watch your boule in flight. 🌿 Terrain unsuited to backspin The player produces good backspin but it doesn't work — the boule keeps rolling after impact. ✓ On ground that's too loose or too sandy, backspin loses its effectiveness. Switch to a carreau or adjust the angle of attack — more vertical to compensate.When to use the backspin — and when to avoid it
✅ Hard or compact ground (packed earth, synthetic, fine gravel) The surface offers enough resistance for the reverse spin to "grip" at the moment of contact. This is the ideal ground for the backspin — the boule brakes sharply and stays in place. → Optimal condition for the backspin ✅ Situation where your boule must occupy the place of the opposing boule In tight doubles or when you need your boule to stay precisely at the jack's spot, the backspin is the only technique that lets you stay in place after the impact. → The backspin as a tactical tool, not just a technical one ⚠️ Wet or slightly slippery ground The boule may slide at the moment of impact rather than brake. The backspin works but in a less predictable way. Adapt the angle of attack (slightly more vertical) or prefer the carreau depending on the situation. → Test at the start of the game, adapt according to the bounces observed ⛔ Deep sandy or very soft ground The boule sinks partially on impact — the spin cannot act against a soft surface. The backspin cancels out and the boule keeps rolling. The carreau is systematically more effective on this type of ground. → Abandon the backspin, switch to the carreau or a direct iron shot ⛔ When you are tired and your technique is degraded The backspin is the most demanding shot in terms of fine technique. At the end of a competition or after many games, the release is the first thing to degrade. An approximate backspin is worth less than a solid carreau. → At the end of a competition, favour the shot you master best3 exercises to embed the backspin
01 The release exercise on soft ground 📍 Lawn or sand ⏱️ 10 min ↩ Visualise the effectThe goal is not to shoot far — it is to see the backspin effect on a surface that amplifies it. On short lawn or slightly damp earth, throw the boule 2 metres in front of you with an exaggerated backspin motion. The boule must leave a clear braking mark on landing. If it keeps rolling, the release was flat — no spin.
Throw at 2 metres only — no more. The point is to see the effect, not to aim far.
Look for the "scuffing" of the boule on the ground on landing: a clear braking mark indicates that the effect is present.
Increase the distance by 50 cm with each series up to 5 metres. Observe at what distance the effect starts to disappear — this is your current "effective backspin zone".
Do it 20 throws focusing only on the index finger release — not on the target, not on the distance.
02 The shot on a fixed boule — measuring the recoil 📍 Hard ground ⏱️ 15 min ↩ Backspin in a real situationPlace a fixed boule at 7 metres. Shoot with a backspin and measure (or estimate) the movement of your boule after the impact. An effective backspin leaves your boule less than 30 cm behind the impact point. A failed backspin leaves your boule 1–2 metres or further away.
Place the target boule and mark its position. Shoot 6 times from the same circle.
After each shot, note where your boule stops relative to the impact point. Classify it: clear recoil / dead stop / boule continues.
Session goal: 4 boules out of 6 that stop within a 40 cm radius behind the impact. Repeat until you reach this goal over 2 consecutive series before increasing the distance.
Increase to 8 metres when the goal is reached at 7 metres. The long-distance backspin requires a sharper spin at the release.
03 The backspin under pressure — simulating the 12-12 📍 Real ground ⏱️ 20 min ↩ Reproducible backspin under stressThe backspin acquired in calm training often disappears in a competition at 11-12. This exercise creates simulated pressure to embed the routine in critical situations.
The rule: each shot "counts". If you miss, you restart the series from zero. Goal: 3 consecutive effective backspins (boule that stops within the 40 cm radius) before moving on to the next distance.
Before each shot, apply your complete pre-shot routine (breathing, aiming point, mental script) — as in a competition. Never shoot without the routine.
After each miss: full RESET. Take a step back, breathe, return to the circle. Do not shoot in the emotion of the miss.
Note your success rate (effective backspins / attempts) for each session. Long-term goal: 70% or more over series from 10 to 8 metres.
The 3 levels of backspin mastery
🌱 Level 1 — Visible backspin The boule produces an observable braking effect.The boule stops within an 80 cm radius after the impact.
Reproducible at 6–7 metres.
50% success in calm training. Goal: understand and see the effect ⚡ Level 2 — Controlled backspin The boule stops within a 40 cm radius after the impact.
Reproducible at 7–9 metres.
70% success in calm training.
Holds up partially under light pressure. Goal: use in a friendly competition 🏆 Level 3 — Formidable backspin The boule regularly takes the place of the opposing boule.
Reproducible at 6–10 metres depending on the ground.
70%+ success rate under competition pressure.
Adaptable to different surfaces. Goal: a decisive weapon in competition ⚠ The trap of the "almost good" backspin
The most dangerous level is level 1.5: the player sometimes produces a beautiful backspin, but randomly — he doesn't know exactly what makes the difference between a good throw and a miss. This player will attempt the backspin in competition hoping that "it works" that evening. The solution: go back to exercises 1 and 2 until you consciously identify what changes between an effective release and a flat release. Consistency is taught, not talent.
Summary — the key points to remember
- ↩The backspin comes from the release, not from force. Reducing power and improving the hand exit always produces more spin than increasing speed.
- ✋The index finger is the generator of the backspin. It is the last finger to leave the boule and it is the one that "scratches" toward you to create the backward rotation.
- 📐The angle of the trajectory matters as much as the spin. A boule that arrives too flat cannot brake properly even with a good release.
- 🌍The backspin is terrain-dependent. On soft or sandy ground, prefer the carreau. The backspin is optimal on hard or gravelly terrain.
- 🔁Consistency is acquired in 3 weeks of targeted practice. Not by shooting 200 boules at random — but by shooting 30 boules a day with conscious attention focused on the release.
- 🧠The backspin under pressure is trained separately. A backspin acquired in calm training disappears in competition if the mental routine is not installed at the same time as the gesture.
The backspin is only one of the techniques covered. The book details the complete biomechanics, the 7 types of shot, the 100 numbered exercises and mental management in competition.
📦 Order on AmazonFAQ — Your frequent questions
Can you make a retro with any ball or do you need special balls? + Any approved ball allows a retro — the technique is not linked to the type of ball. However, the grooves of the ball play a role in grip at impact. Balls with deep grooves (often shooter balls) "grip" slightly better on the ground and amplify the effect. Smooth balls (pointer) can also produce an effective throwback if the release is correct. The ball is not the explanation for a failed retro — the drop almost always is. Does retro damage balls faster than other types of shots? + Not significantly. The retro creates a slightly different ground friction than other shots, but the approved balls are designed to withstand thousands of impacts. What damages balls is mainly ball-to-ball impacts — not the rotation type. You can shoot retro for a whole season without your balls suffering any more. I have a good track record when training alone, but it disappears in competitions. For what ? + This is one of the most common and frustrating problems. It has two main causes. First cause: the tension under pressure — in competition, the muscles tense, the hand tenses and the fine release of the index finger becomes abrupt or absent. The solution is the pre-shot mental routine (breathing, releasing) and the retro exercise under simulated pressure (exercise 3). Second cause: you learned retro in always identical conditions — same distance, same terrain, same time. In competitions, conditions change and your gesture is not yet adaptive. Vary the training conditions. Is the retro reserved for shooters or can the middle class also use it? + Technically, the retro is used mainly by shooters - but nothing prevents the middle from mastering it. In certain tactical situations (an annoying placed ball that the midfielder must clear), a clean throwback can be more effective than a classic shot. In triplets, the middle who masters the retro is an additional asset. The learning is the same — it’s the context of use that differs. What is the difference between a retro and a recoil shot? + The backspin is defined by the backward rotation of the boule at the moment of release — it is a type of spin imparted to the boule. The recoil shot describes the behavior of the opponent's boule after impact: it recoils back toward its own side rather than being ejected sideways. A well-executed backspin can cause the opponent's boule to recoil, but it is not systematic — it depends on the angle and the precision. In practice, the two terms are often used as synonyms in players' everyday language, even though technically they describe two slightly different things. 📎 Related articles Equipment Top 3 best shooter boules 2026 Equipment Stainless steel vs carbon boules — what impact on your shot? Rules The one-minute rule — what every shooter should know Regulations Validity of the jack throw — the exact rules Video All refereeing videos — PétanqueLand Tools Free tools — draw generator and more© Pétanque by Paquita — petanqueland.fr · 📖 Paquita's book on Amazon